Want to learn how to supercharge your BIM processes? Here are some useful ArchiFrame hacks and tips from users and ArchiFrame developers.
ArchiFrame is a BIM powerhouse with lots of shortcuts and hidden features that you might not be aware of yet. Through years of working with ArchiFrame, our users have found tonnes of useful hacks to help simplify their lives.
From speeding up window framing to angled drillings and finding things via search faster, we hope these tips make your lives easier! Got an awesome hack to share? Scroll to the bottom to find out how to be featured.
#1 Window framing hack: get window framing done in minutes
Thanks to Jan-Frode Nilsen from Lindal Gruppen for this super time-saving tip!
Did you know that you can use ArchiFrame to execute window framing quickly and easily, and then use the function ‘paste picked planks’ to duplicate the framing to other windows in the model?

As Jan-Frode explains: “in the model, it will look like I have spent hours and hours on framing all the windows, but this way, it hardly takes me a few minutes to do it”.
Jan-Frode’s way to do it:
- Find one window in the floor plan after the ArchiFrame-wall has been generated. Draw in the framing exactly as it will be built. (Create the weatherboard in ArchiFrameBlocksChanges). If you have already created framing in another project, it can easily be copied over and placed in the right spot. For easy picking, create a separate layer for window framing.
- When you have done framing for one, pick all the parts and connect them to the panel layer in the correct element:
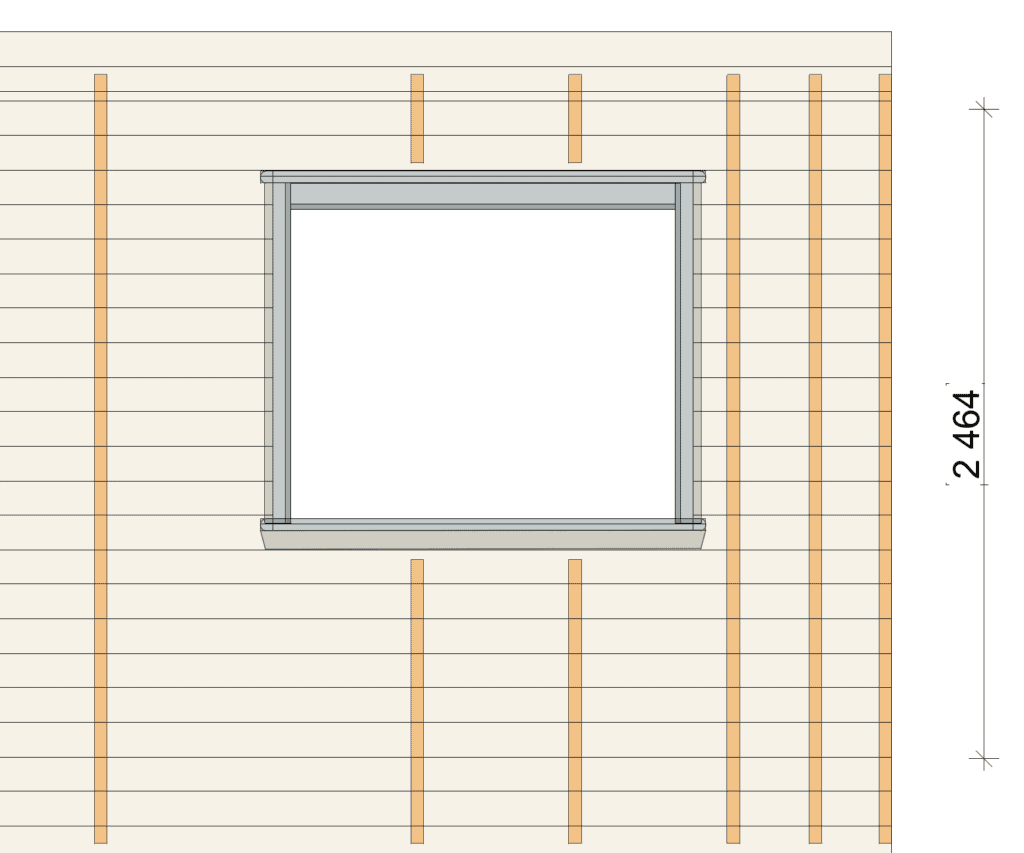
- Now that you have one window done correctly, you can pick all those parts using the ‘pick’ tool and then go to other panel elements with windows and use ‘Paste picked planks’ to transfer them over. Some adjustments may be needed to help land them in the correct spot, but this is pretty easy when you know how they refer to the opening in the panel. Just get them in there and move them around and adjust the size (most of the time the windows have module sizes, so this is quick and easy.) You can also use this method across floors.
- After a few minutes of doing this, your model will look 100 times better for the customer! Plus, every time you do it, the faster you get.
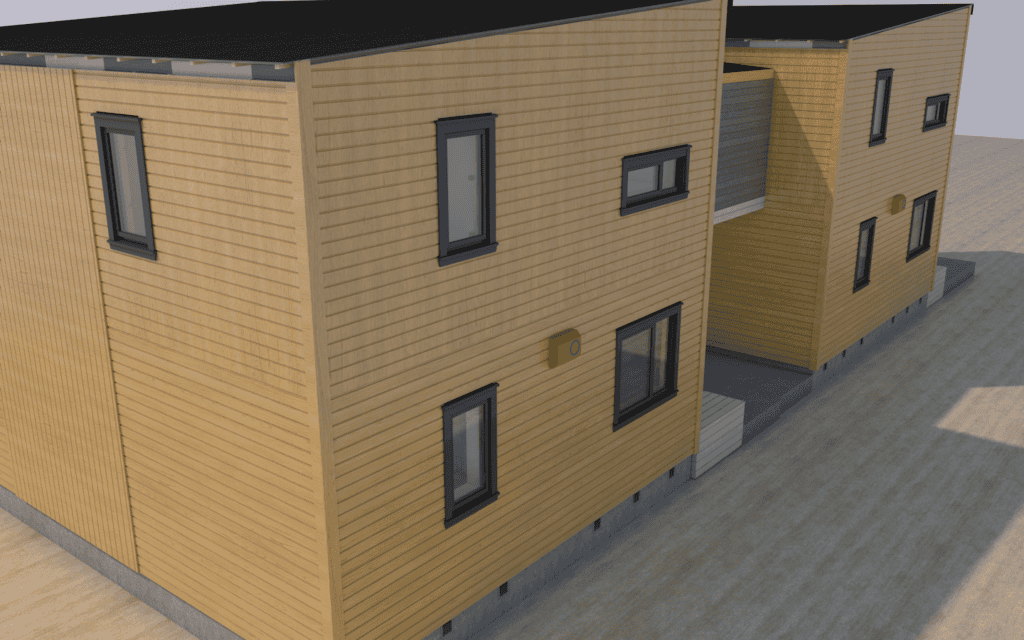
“Before you know it, you can frame the entire model in just a few minutes. I always do. Using only manual planks I can create any window frame quickly without programming anything: when I am happy with one window I just start spreading them around the model!
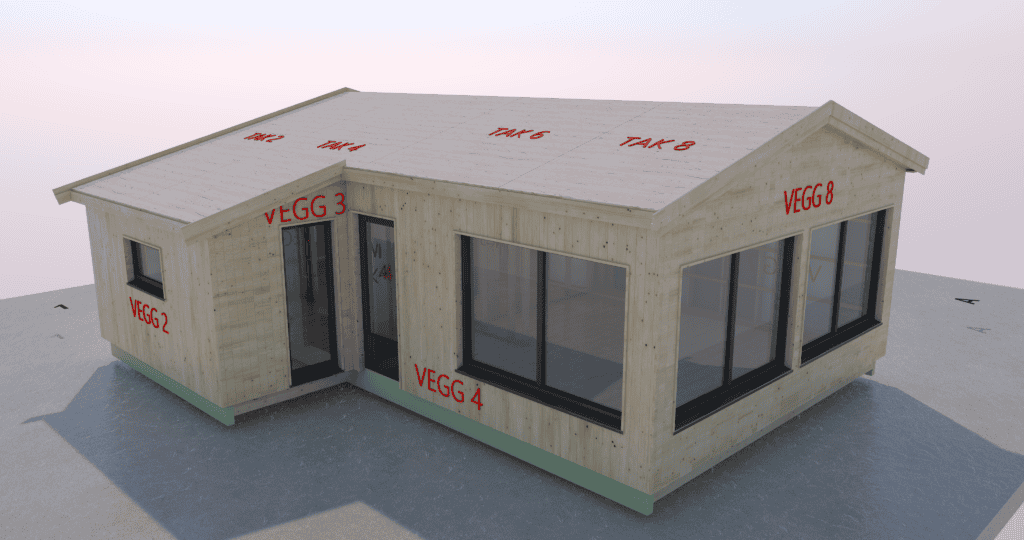
Another plus-side is that once you have these things drawn, you can also easily get out the quantity for everything”.
#2 Create V-Cut operations using two lines
In the video below, Benjamin Fischer, ArchiFrame Developer, goes through how to use the “v-cut with selected line(s)” function in the Cut&Join tool that makes cutting planks and machinings a lot faster.
In fact, you can easily create V-Cut operations using two lines, as shown in this video:
It is very easy to edit the angle and position of the cut with the help of hotspot handles. Plus, you have the option to select multiple planks at once and bulk cut them.
#3 Using cladding for visualisation options
Cladding is useful for visualisation: use it during the design stage as part of your drafting process in order to bring a building to life.
Moreno Vrijma from Designis explains: “Not only do we use it for the renders, but also for creating some design options by offering different kinds of cladding. In the renders below you can see the external timber cladding made by ArchiFrame, and the roof covering is also made by the cladding tool as well as the ceiling. When you change the panel options and you have predetermined presets, once you choose the desired preset parameters, the cladding changes”.
Check out the videos below for examples of this hack in use:
#4 Surface material and plank ID changes through editing XML settings
By editing the XML settings in ArchiFrame you can edit the surface material and have plank IDs show up the floor plan in different ways. This is great for users who have specific processes they need to follow.
Here is a video that takes you through the process:
(Please note that the same technique works also for ArchiFrameBoard- and ArchiFrameElement -objects).
First, you will begin by modifying the way plank IDs are shown and the material used. Then, to make these the default setting, you need to edit ArchiFrame’s XML-settings:
- Go to Archicad and open the ArchiFramePlank object where you will need to use the correct internal name for the parameter.
- Then, you will need to copy and set the desired variables and parameters. To set a surface material, you need to modify the standard Archicad setting for the object.
- Once you have made all your changes and set all the parameters and the IDs etc, you will need to save the file to reload the settings. From now on, any newly placed plank will use the settings you entered”.
#5 Shingles hack
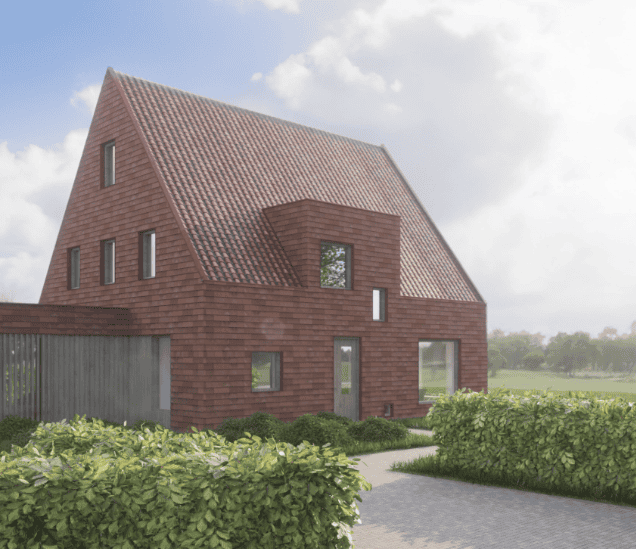
When Moreno from Designis wanted to create shingles for his latest design, he reached out to Petteri to figure out how to create gaps between planks to create a shingle effect using ArchiFrame.
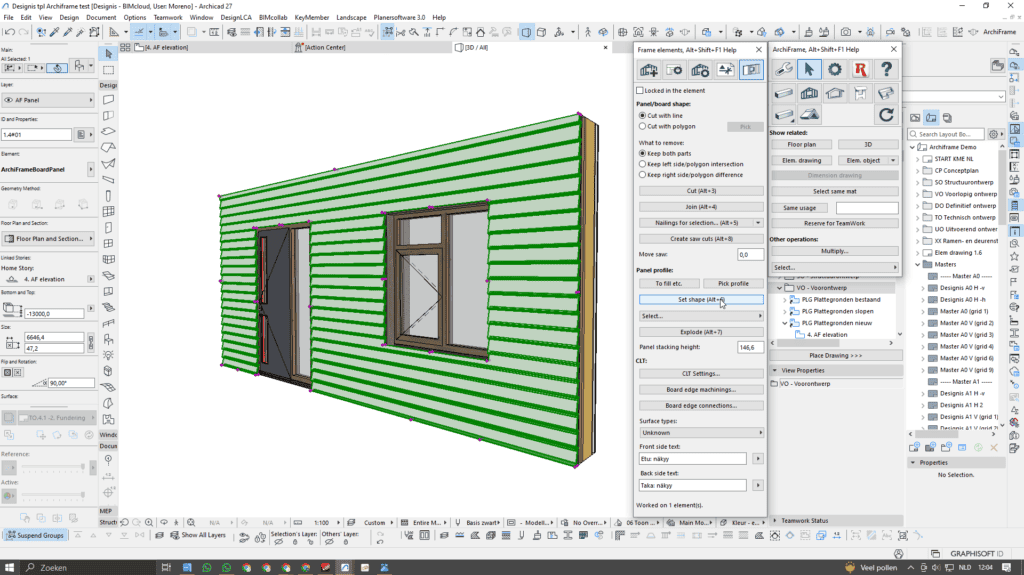
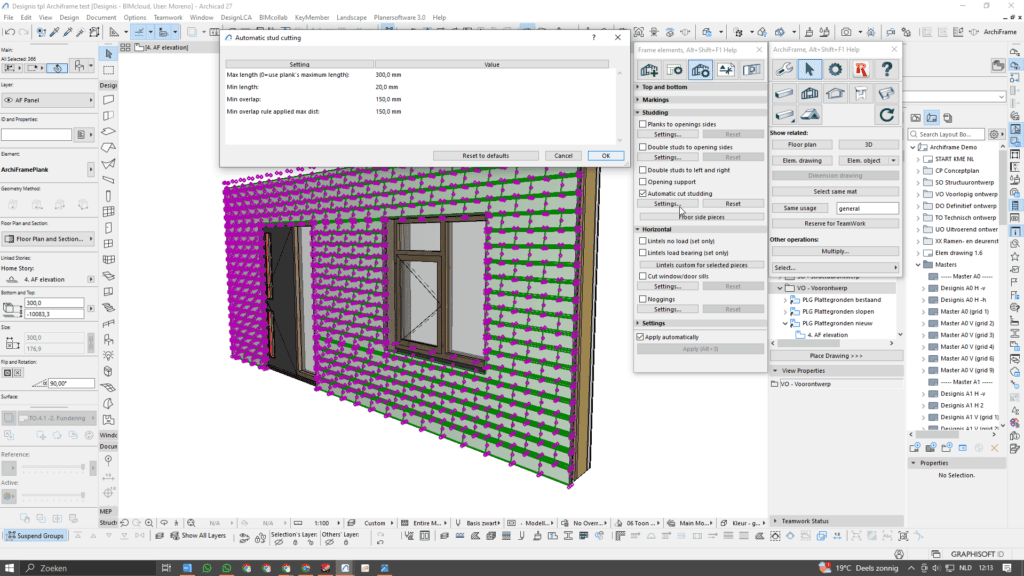
The hack: create a profile as if for a deviating Swedish rebate cladding and then divide the planks with ‘Automatic stud cutting’ to create separate planks. Details below.
First, create the panel profile:
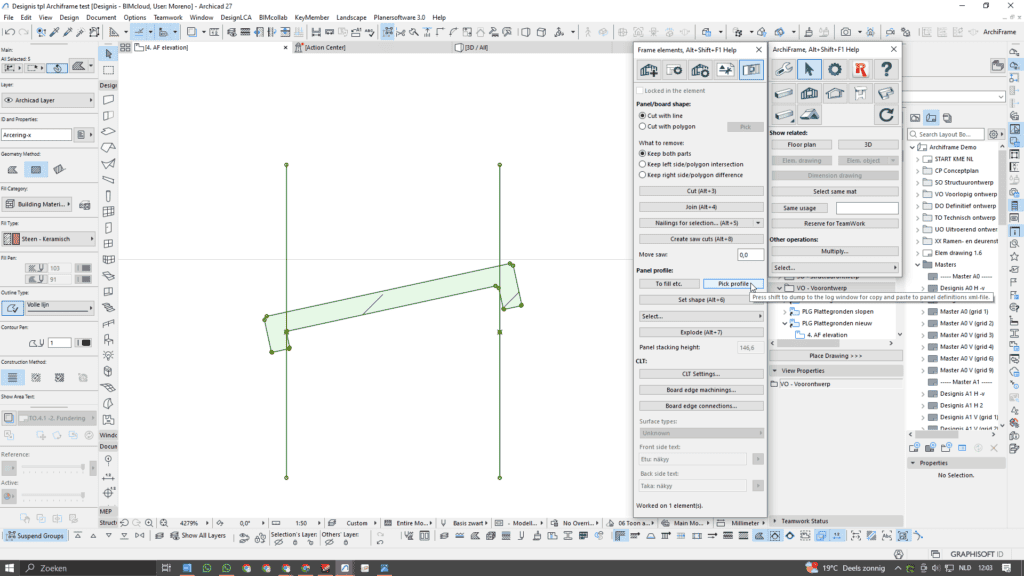
Set shape and Explode:
Set the right properties and add Automatic cut studding:
And the end result!

#6 Context-sensitive help shortcut
Wherever you are in ArchiFrame, you can always get context-sensitive help by pressing ALT+SHIFT+F1 in Windows, Option+Shift+F1 in Mac (please note that in laptops you may also need to press the Fn-key to enable the function keys). When this happens, a dialogue box will pop up and you will be taken to the correct place in the manual. A great shortcut to have in your back pocket!
#7 QuickSum for fast calculations
Thanks to Marius Henriksen Indrestrand from Støren Treindustri for this hack.
If you want to quickly sum the length of selected planks, this script is for you. As Marius says, “it shows how versatile the ArchiFrame add-on is with possibilities to make your own scripts.”
When you use this script, all selected planks will be sorted by material ID and the total length of each type will be displayed in the ArchiFrame log window. It’s a quick way of getting the total length of planks, without having to go through Excel or using AC Schedules.
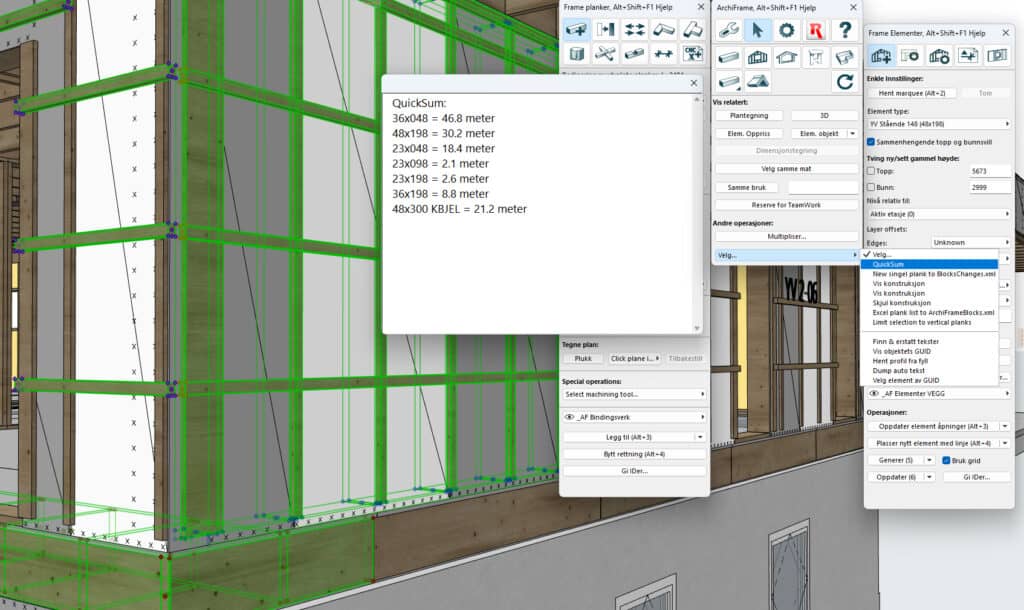
Download the XML script here to test it yourself!
#8 Making angled drillings
Did you know that you can make your drillings angled, which allows for more design flexibility?
This short tutorial will explain how to make it happen:
Benjamin explains the process:
- Start by selecting your plank and operator planks.
- Then, go to the Machining list and select the Grooves Tool.
- Select the target and check the Groove type as Drilling.
- Select the operators and your target will now have a drilling. The operator size will determine the drilling size and it will all happen automatically.
#9 Archicad Find & Select
Another great tip from Marius!
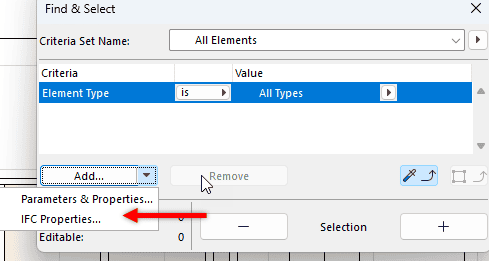
“Since Archicad Find and Select function does not support searching for things like ArchiFramePlank internal variables, I have made a set of lists in our Template. Let’s say I want to do something to all bottom or top plates in my project, or to several walls. Then I can use Archicad Schedules to search for the ArchiFramePlank library variable “Group” = bottom_force. – Having the “Is just a projection” in criteria helps remove the duplicated objects in Layouts.

I have set this up for some normal types like top/bottom plates for walls, and contour beams for floors. Also one list is easy to edit in order to locate the wanted pieces by changing layer, or Group name, for example vertical_x or whatever type you are looking for”.
#10 Fetch corner settings
Another great tip from Marius!
Click on a wall with corners already set, then select a new wall and click “add”. This helps with searching through 100 corner types if you are using a lot of the same settings.
#11 Group name hack for no lines
Another great tip from Marius!
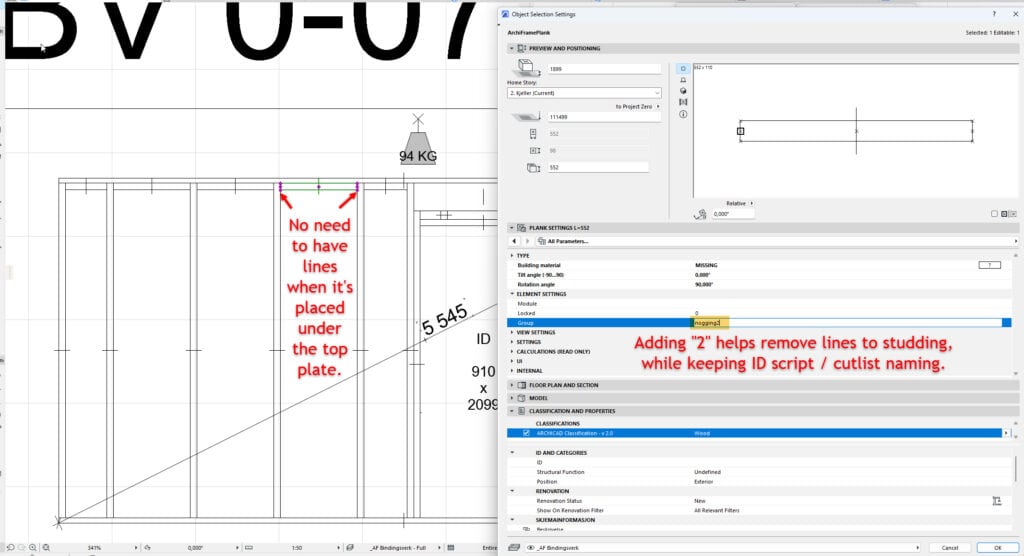
Change the “Group” name of the plank from “nogging” to “nogging2” (or add some other letter behind). This change will still result in the correct name being shown in the cutlist, or renumber scripts, but the nogging will not set marking lines to ex. vertical_spacing.
“This can be used when I don’t want spacing beams getting their own ID just because of lines. Example: the nogging is in the end as a double contour beam where there is no need for lines”.
#12 Setting IDs for ArchiFrame walls in harmony with Archicad
Here comes a tip from Marius on linking Archicad ID with ArchiFrame ID: “I try to teach my colleagues if possible, to do the ID management before ArchiFrame. If we explode hotlinks, or draw our Archicad walls ourselves, we should create the IDs for those elements. So then, when we add ArchiFrame elements, element copy their IDs from the Archicad wall ID, and everything is connected.”
This also makes it easier to deal with IFC and exporting as IDs are harmonised and consistent. The ArchiFrame set element IDs function also works on Walls (Archicad). So if you would like to take use of the possible algorithm in that function, you can use that to set ID’s. This works on wall, beam, columns that I know of.
#13 Performance hack
Thanks to Marius for sending this one in! In a nutshell: don’t have the “Set element option” visible, that makes ArchiFrame really really slow when selecting pieces. This is also true for extended machinings pallet, but it does not affect things as much as the set element does.
#14 Create a dimension drawing (dimdrawing)
You can use the Plank Tool palette and the Drawings button to create a Dimension drawing.
A dimension drawing contains some dimensioned projections of a plank or board and additional data in text form.
In this video, Archicad Developer Géza Böhm goes into detail about dimension drawings in ArchiFrame: what they are, where to create them, and how to edit and adjust them:
While an element drawing is automatically created for an ArchiFrame element, a dimension drawing for individual planks is not created automatically, so you will have to set them up.
Got a cool way to use ArchiFrame? Want it to be featured? Share it with us and email kayleigh@archiframe.fi with your tip!

